Showing posts with label Decorating. Show all posts

7.17.2015

Our new and improved laundry... Did someone say storage?


When building a home, you try and cram as many ideas and wants as you can in the process. 
 
Unfortunately, in the process, sometimes there are wants that just don't get across the line due to sheer lack of availability or funds.
 
It was an exciting month in The Bower Birds  Nest, as I was able to see of my 'wants' come to life and get the laundry I wanted. 
Even if it was 18months down the track...
 
So here it is!
 
Our new and improved laundry.
 
It makes me VERY happy. Like kind of a bit sickly happy. We all know by now that I am a bit odd like that. Oh and that I also like to label everything.
 
Enjoy the laundry gallery!


Steph
xx


12.29.2014

The cubby house.

For the past five months, we have been busy putting together something that will hopefully last in our  children's  memories forever.

We wanted them to have a cubby. 

But not just a cubby that is filled with spiders, plastic chairs and tea set....

We wanted another space for them to play and use their little imaginations.

We wanted it to feel cozy.

We wanted them to feel warm and safe in there.

We wanted it to be beautiful.

So we pencilled together a plan.

Dad'n got building and I got busy creating a styling vision for the interior.

It was a bit of a drawn out process but since we had until Christmas to get it sorted, we had the time to plod along at it. 

The kids were well aware of what was being built, but it was "Santa" that sprinkled his magic and turned it from the blank white space into something just a little bit special.

For those that came along on our cubby building journey on Instagram, I'm sure you are just as relived to see it finished as we were.

So here it is!

Our cubby.


3.27.2014

Painting a chalk board wall...

One morning, I woke up and decided that I needed a chalk board wall in my life.

But where?
 
I knew with my (and Dad'ns) OCD ways, we couldn't have it in a main area of the house. Not only would this chalkboard be for me, but the kids would also be on there too. I had already visualised lots of smudged artwork and chalk dust everywhere. This idea took some deep breaths,
 
I decided that our pantry was the perfect spot for said chalkboard.
 
I could have all my fun on it, the kids could go crazy, and when I no longer wanted to see it... I just close the pantry door. Perfect!
 
Dad'n was sceptical but knows better than to doubt my decorating ideas. Mainly because it just ends in me sulking.  
 
My inspiration was found very quickly. Thanks Pintrest. And we were off to Bunnings the same morning. When I want something done... I want it done yesterday. That's just how I roll.
 
So that evening, my chalk board came to life.
 
Two coats. A few drip crisis's, and please note, chalkboard paint isn't the easiest things to get off. You need to wipe it the SECOND it drops. It was a bit hairy scary.
 
 It was so black going up. Dad'n gave a few "are you sure this was a good idea" comments.
 
But then it was finished and I was absolutely in love. It suits our home perfectly! Love, love, love it.
 
 
                   Before                              After


 If you are toying with the idea of adding a chalkboard wall into you life, I say go for it. They are a bit fab. 

3.25.2014

Operation "Playroom organisation"

If you follow me on Facebook, you will know that we are in the process of organising our playroom. 

To be honest... I've been on this operation since we moved in but have never managed to finish it off.

So here is what we have going on to keep chaos to a minimum and easy fun playing to a maximum!

When designing our floor plan for this house, storage in our playroom was really up there on my priority list.

We decided on two shelved cupboards on the TV wall which meant it didn't eat up any wall space, and also added to the bulkhead effect around the TV feature wall.


You could also organise similar to this with Ikea Expedit unit's, bookcases, shelving units.

We have used this system for quite some time now, the "homing similar items in a box" system.

I have found that it is easy to manage as at the end of the day, we just lay which ever box is needed on the floor, and usually its 6+ boxes. Sometimes its all of them. Not all the time.  Then everything gets put in the appropriate box, and put away.

I now have each box labelled with not only the word of the items that are in the box, but also a picture to help with recognition.

The containers I ended up settling on were from Target.
 
After doing the rounds, I found these to be sturdy, cost effective,  they had clear windows to help see what's in them, and they came in a variety of sizes.
 
The cupboard to the left I decided to dedicate it to all of the containers.


The cupboard to the right homes Boo's dress up's down the bottom. This was just achieved with a hanging rail below one of the shelves.
It is also is home to all our art and craft supplies.
Then above we keep our kinder and swimming bags which are always repacked and placed back in their home at the end of the day.


Oh and the top shelf. The special top shelf.
 
It is reserved for toys that have driven Mummy insane, the ones that need a "rest".
 
We also keep our Easter egg hunt baskets up there. Better dust them off soon for when the fluffy bunny visits!
 
So that is our major storage covered...
 
We also have a 4 x 4 cube Expedit unit to house all our every day toys, ones that don't require storing.
 
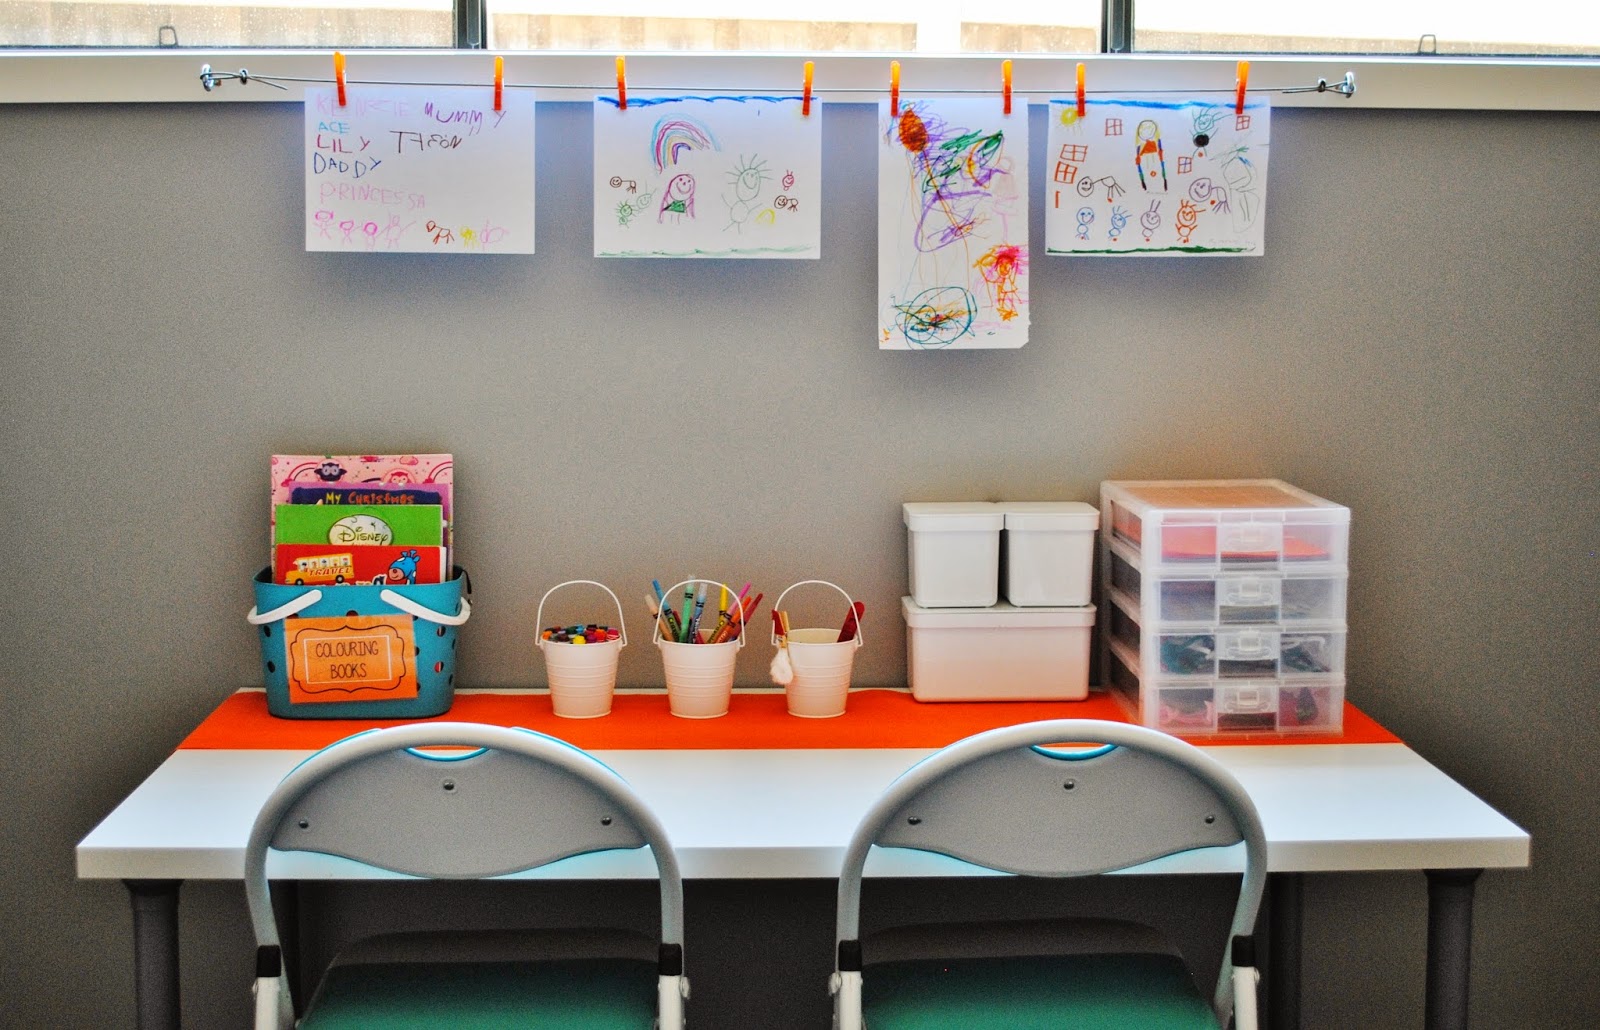
And also a kids desk that is home to all drawing and colouring in things.
 
  
I hope that has given you some insight in to how we try to keep our playroom organised and maybe given you some ideas?
 
Maybe you already have a fab system that you find works well?
 
 
Share it! Find me on FB and pop some pics up! Would love everyone to get sharing.
 
Until next time...


2.02.2014

Now we needed the perfect spot to hang the masterpieces!


This morning brought yet another trip to Bunnings, we are frequent flyer's there that's for sure!

While we were there I sprung it on Dad'n that I wanted him to whip us something up for above the kids craft area. Somewhere that we could hang paintings to dry or show off what pretty things the kids had created.

Here is what he came up with. I love, love, LOVE it!


Here is a list of what we used:
2m of Braided wire rope ($5.60)
Zenith Screw eyes ($4.30)
Zenith Wire rope grips ($6.40)
So it came to a total of $16.30. Not to bad at all.


Now Boo is working over time so she can change all the pictures over. Bless.

1.29.2014

A little corner to create a masterpiece...

After researching (ie. scrolling through Pintrest) playrooms, I had come to the conclusion that I liked the concept of creating zones within the playroom.

I liked that the kids could focus on that one task and have everything there in that space that they need to keep them engaged. They can then they move on to another area once they were over it, and hopefully tidy up before they do so. Wishful thinking that last point.

At the moment, I am on my way to finishing their first zone. Their little corner to create a masterpiece. A few more little finishing touches to go, but I can see the finished product.

Boy has it been getting a work out. The kids LOVE this spot. So much drawing, colouring in, sticking... It's been amazing how much it has encouraged them to create by just having the area set up to use as they please.

I know that it may not be appropriate for everyone to have crayons and texta's available on hand as some little cherubs may take to walls ect. I have given my two the benefit of the doubt and until they abuse the privilege of having free run of the crayons... they can stay.

Where is that wood to touch?


Now to move on to their second zone. The kitchen / pretend play area. Waiting on Dad'n to approve the plans I submitted, just like council approval here LOL. Not really, but I need his builder hat on to get it finished. Beyond my scope of practice it is ;)


3.29.2012

Time for Ace to have a bedroom

Anyone that knows me, knows I love a good nursery. As soon as I found out we pregnant with both of the babes, the nursery was almost the first topic of conversation.

In our "old" house, I can call it that now we are all settled here, we decorated Ace's room whilst he was still a belly babe. We painted the room, got the nursery furniture, but I never got to put the finishing touches to it. He was still sleeping in our room up until before we moved. I hadn't really got the idea of it being his room as he didn't live in there. It still needed fluffing.


Actually, now that I have just uploaded that picture, it does look finished but it wasn't, I promise, I still had plans.

So now that we have moved, Ace is in his own bedroom, and yes I'm still sobbing about it weeks later. His bedroom is a blank canvas. I would like to "finish" it. I cant go all out on this one as we are renting at the moment but I'm sure I'll be able to make it look good ;)

The room decorating begins.

I'll keep you updated as I make progress.

So far:

I have kept the lime green as my accessory colour, as I already had so much in the colour.


I found this adorable fabric at spotlight this week and have covered a frame. God I love staple guns. Oh and glue guns! Sorry, distracted much... So now I just have to hang that up.


Hopefully I will get back to spotlight later in the week to pick up some more projects to continue....